
How to Install a VPN on Windows in 2026 (Step-by-Step)
Three proven ways to install a VPN on Windows 10 and 11 – the one-click app method, manual OpenVPN, and command-line for power users – plus fixes for every common install error.
Is a VPN Installation on Windows Still Necessary in 2026?

Yes – arguably more than ever. Internet security has improved, but so have the threats. A proper VPN install on Windows creates an encrypted tunnel for your traffic: it protects you from snoopers on public Wi-Fi, stops your ISP from logging your browsing history, and lets you reach geo-restricted content. In 2026, with far more IoT and smart-home devices tied to our Windows PCs, the attack surface for cybercriminals has widened, which makes a clean Windows VPN setup a baseline privacy step rather than a nice-to-have.
It is also worth being honest about what a VPN does not do. It won’t make you anonymous by itself, it won’t stop you handing over data to sites you log into, and it won’t replace good habits like updates and a password manager. Think of it as one strong layer – encryption in transit and IP masking – that pairs with the rest of your security setup.
Does Windows Have a Built-in VPN Client You Can Use?
Yes. Windows 10 and 11 both include a native VPN client under Settings → Network & internet → VPN. But there’s an important catch: this is not a commercial VPN service. The built-in client is built to connect to a VPN server you already have access to – a workplace network, or a home server you set up yourself – using protocols like IKEv2, L2TP/IPsec, SSTP or PPTP. It’s excellent for remote work, but it does not provide the anonymity, huge server networks, or geo-spoofing of a commercial provider.
So if your goal is hiding your IP address, beating throttling, or accessing streaming libraries from other countries, the native client alone won’t get you there – you’ll want a third-party app. Here’s how the two compare:
| Feature | Built-in Windows client | Third-party VPN app |
|---|---|---|
| Setup effort | Manual (enter server, protocol, keys) | One click |
| Server network | Only servers you own | Thousands worldwide |
| Hide your IP / geo-unblock | No | Yes |
| Kill switch & split tunneling | No | Yes |
| WireGuard support | Not natively | Yes (fastest) |
| Best for | Work / home server access | Privacy, streaming, everyday use |
Why Use a Third-Party VPN App Instead of the Native Windows Client?

Third-party VPN apps give you a friendly interface and thousands of servers worldwide. Unlike the native client – which needs manual entry of server addresses and protocols – modern apps offer one-click connectivity and pick the best server for you automatically.
They also bundle security features the native client lacks:
- Kill switch – instantly blocks all internet traffic if the VPN drops, so your real IP never leaks.
- Split tunneling – choose which apps use the VPN and which use your normal connection.
- Obfuscation – disguises VPN traffic as ordinary HTTPS, useful on restrictive networks.
- WireGuard – as of 2026 most premium providers ship WireGuard, which is dramatically faster than the older protocols the native client relies on.
In short: the native client is a tool for connecting to a specific server; a third-party app is a complete privacy product.
What Are the System Requirements for a VPN Installation on Windows?
Before you begin, confirm your PC meets the basics. Most 2026 VPN clients are lightweight, but it’s worth a quick check:
- Operating system: Windows 10 (x64, arm64) or Windows 11 (all editions except IoT).
- RAM: at least 1 GB free, though 2 GB is recommended for smooth operation.
- Storage: roughly 200–300 MB of free disk space for the app files.
- Processor: any modern Intel or AMD chip with SSE2 support. ARM-based devices (like the Surface Pro X) are now widely supported by major providers – just grab the ARM64 build.
- Permissions: administrator rights on the PC (needed to install the network driver).
How to Choose the Right VPN for Your Windows PC Before Installing
Picking the right provider is the real first step. With hundreds of options, prioritise these features for a secure, fast experience:
- Strong encryption – AES-256, or the newer ChaCha20-Poly1305 used by WireGuard.
- Audited no-logs policy – publicly verifiable, ideally checked by an independent third party.
- Kill switch – non-negotiable; it prevents leaks if the connection drops.
- Protocol choice – the best clients offer OpenVPN, IKEv2 and WireGuard. WireGuard is the speed standard in 2026.
- Server network – a wide spread of servers means a fast connection wherever you are.
Which protocol should you pick?
| Protocol | Speed | Security | Best for |
|---|---|---|---|
| WireGuard | Fastest | Excellent | Everyday use, streaming, gaming |
| OpenVPN | Good | Excellent | Maximum compatibility, restrictive networks |
| IKEv2 | Fast | Very good | Mobile / switching networks |
The Best VPNs to Install on Windows
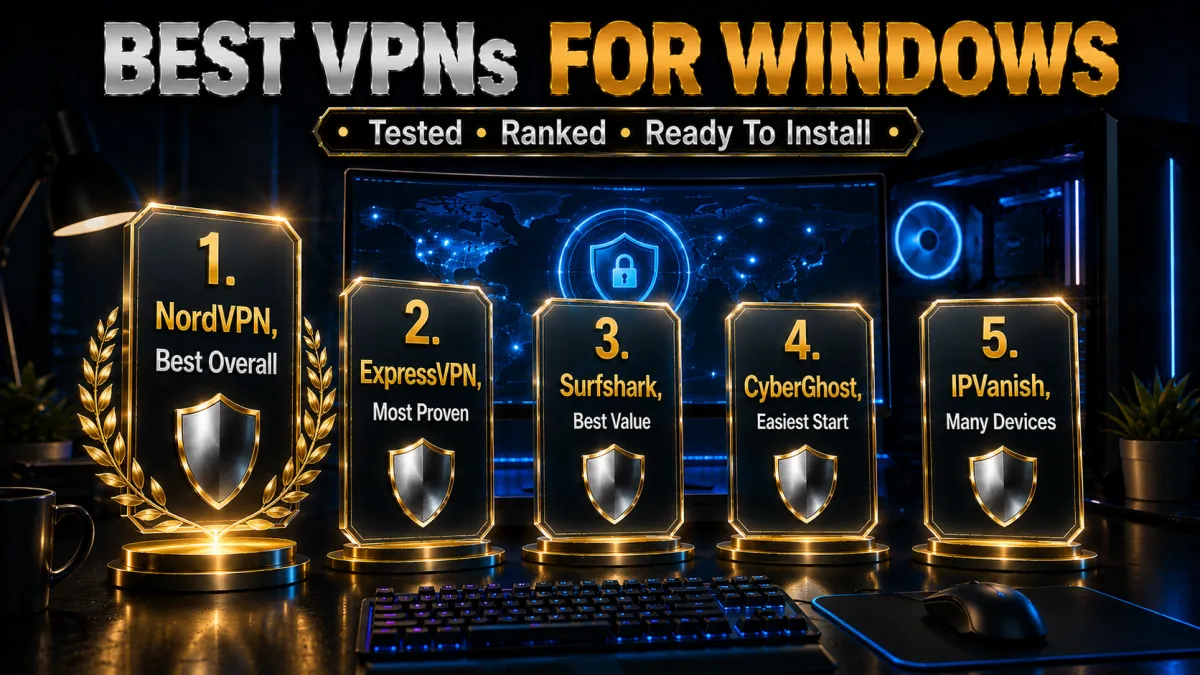
Before you follow the install steps below, here are the five VPNs we recommend for a Windows PC. All five offer a native, signed Windows installer, a kill switch, and a money-back guarantee, so you can try one risk-free.
1. NordVPN, best overall for Windows
NordVPN has the most polished Windows app of the group. Installation is a signed installer straight from the official site, and once it is running you get one-click connect, an interactive server map, and a reliable kill switch that cuts traffic the instant the tunnel drops so nothing leaks while you reconnect. NordLynx, its WireGuard-based protocol, keeps speeds high and overhead low, which you notice most on large downloads and video calls.
On a day-to-day Windows PC the extras earn their keep. Threat Protection blocks ads, trackers, and known malicious domains at the system level, split tunneling lets you route only chosen apps through the VPN, and the app stays stable through sleep, wake, and Wi-Fi changes without needing a manual reconnect. Auto-connect on untrusted networks is a single toggle.
Behind the polish is a genuinely strong privacy footing: an independently audited no-logs policy, RAM-based server infrastructure, and Panama jurisdiction outside the major surveillance alliances. Paired with a 30-day money-back guarantee, it is the strongest all-round choice for a Windows machine whether you care most about speed, security, or simply an app that stays out of your way.
✔ Pros
- Most polished Windows app
- One-click install and connect
- NordLynx (WireGuard) for speed
- Reliable kill switch and Threat Protection
- Independently audited no-logs
✘ Cons
- Best price needs a longer plan
- Occasional app updates required
| Windows app | Native, signed installer |
| Best protocol | NordLynx (WireGuard) |
| Kill switch | Yes |
| Price from | ~$3 to $4/mo (long-term plan) |
| Simultaneous devices | 10 |
| Money-back guarantee | 30 days |
2. ExpressVPN, easiest and most proven
ExpressVPN is the smoothest install experience on Windows. The app is clean and uncluttered, its Lightway protocol reconnects quickly and holds stable through sleep and network changes, and the whole thing is designed so a non-technical user can install it and connect without ever opening a settings menu. That simplicity is the main reason it lands here despite being the priciest option.
Under the hood the fundamentals are all present. There is a proper kill switch called Network Lock, split tunneling to exclude specific apps, and broad protocol support if you ever want to change it. Servers stay responsive at peak hours, and the Windows client handles Windows 10 and 11 identically, so you are not chasing compatibility quirks.
What really sets it apart is trust: every server runs on RAM-only TrustedServer infrastructure that wipes on each reboot, the company sits in the British Virgin Islands outside intelligence-sharing alliances, and its no-logs claims have held up in independent audits and real-world seizures. A 30-day money-back guarantee lets less technical users confirm it fits their PC before paying long term.
✔ Pros
- Cleanest, simplest Windows app
- Lightway protocol reconnects fast
- Very stable through sleep and network changes
- Strong privacy track record
- Excellent 24/7 support
✘ Cons
- Costs more than most rivals
- Fewer devices per plan
| Windows app | Native, signed installer |
| Best protocol | Lightway |
| Kill switch | Yes (Network Lock) |
| Price from | ~$6 to $7/mo (long-term plan) |
| Simultaneous devices | 8 |
| Money-back guarantee | 30 days |
3. Surfshark, best value for Windows
Surfshark installs cleanly on Windows and covers unlimited devices on a single plan, so one subscription can protect every PC, laptop, and tablet in the house without counting seats. The app supports WireGuard for low-overhead speed and keeps the interface simple enough that setup takes a couple of minutes from download to first connection.
For a Windows user the feature list is unusually generous for the price. CleanWeb strips ads and blocks known malicious domains, a split-tunneling tool called Bypasser lets local or trusted apps skip the tunnel, and a kill switch guards against leaks if the connection drops. Rotating IP and multi-hop options are there for anyone who wants extra separation.
The company is based in the Netherlands with an audited no-logs policy, and while its server fleet is not the largest, routing on a desktop connection is dependable. The standout remains value: it is the cheapest full-featured pick of the five, and a 30-day money-back guarantee means you can cover an entire household of Windows machines with no real risk in trying it.
✔ Pros
- Unlimited devices on one plan
- WireGuard for low-overhead speed
- CleanWeb ad and malware blocking
- Clean, modern Windows app
- Lowest long-term price
✘ Cons
- Smaller server network than the top two
- Occasional server switching needed
| Windows app | Native, signed installer |
| Best protocol | WireGuard |
| Kill switch | Yes |
| Price from | ~$2 to $3/mo (long-term plan) |
| Simultaneous devices | Unlimited |
| Money-back guarantee | 30 days |
4. CyberGhost, easiest for beginners
CyberGhost has the most beginner-friendly Windows app of the group. It labels servers by purpose, including streaming and gaming categories, so a first-time user can pick the right one without understanding the difference between protocols or ports; you click a use case and connect. For someone installing their first VPN on a PC, that guidance removes most of the guesswork.
The app is not just a pretty face. It runs WireGuard for efficient speeds, includes a kill switch and DNS-leak protection, and offers split tunneling so you can keep specific programs off the VPN. It is based in Romania, which has no mandatory data-retention law, and backs a strict no-logs policy with optional in-house NoSpy servers for the extra-cautious.
The headline advantage for testing on Windows is the trial window: a 45-day money-back guarantee, far longer than the usual 30, gives you a full month and a half to confirm it behaves on your hardware and network before committing. Performance is dependable rather than the very fastest, a fair trade for how approachable the whole package is.
✔ Pros
- Beginner-friendly, labelled servers
- Romania-based, no data-retention law
- Longest 45-day money-back window
- One-click Windows install
- Large server network
✘ Cons
- Slower under heavy peak load
- Fewer devices than the value picks
| Windows app | Native, signed installer |
| Best protocol | WireGuard |
| Kill switch | Yes |
| Price from | ~$2 to $3/mo (long-term plan) |
| Simultaneous devices | 7 |
| Money-back guarantee | 45 days |
5. IPVanish, best for many devices
IPVanish runs its own server network rather than leasing from third parties, which gives it steady, predictable speed on a Windows connection and tight control over routing. It allows unlimited simultaneous connections, so every PC and device in the house can run it on one account, and the desktop app includes a kill switch, split tunneling, and a choice of protocols including WireGuard.
The Windows client is straightforward and functional rather than flashy, with a server list, a connection graph, and the settings most people need without clutter. For users who value raw throughput and simple, no-nonsense operation over a polished interface or bundled extras, it delivers the essentials reliably.
The honest caveat is jurisdiction: IPVanish is based in the United States, a member of the Five and Nine Eyes alliances, so privacy purists may prefer an offshore provider. It offsets that with an independently audited no-logs policy and a 30-day money-back guarantee, and for a budget-conscious Windows user who mainly wants dependable speed and unlimited devices, the value is hard to argue with.
✔ Pros
- Owns its network for steady speed
- Unlimited simultaneous devices
- Kill switch included
- Simple, no-clutter Windows app
- Strong long-term value
✘ Cons
- US-based, inside the 9 Eyes alliance
- Interface plainer than rivals
| Windows app | Native, signed installer |
| Best protocol | WireGuard |
| Kill switch | Yes |
| Price from | ~$3 to $4/mo (long-term plan) |
| Simultaneous devices | Unlimited |
| Money-back guarantee | 30 days |
How to Install a VPN on Windows Using a Provider’s App

This is the method for almost everyone – automated and simple. It takes about a minute end to end.
- Download the official Windows installer. Go to your provider’s official website, open the Downloads or Apps section, and grab the Windows version. Only download from the official source – never a third-party mirror – to avoid tampered copies. The file is usually named like
vpn_installer_setup.exe. - Run the installer as administrator. In your Downloads folder, right-click the installer and choose Run as administrator. The VPN needs to install virtual network adapters and drivers, which requires admin rights. If User Account Control (UAC) prompts you, click Yes.
- Follow the installation wizard. Pick your language, accept the terms and privacy policy, and leave the default install path unless you have a reason to change it. Click Install and wait – it usually finishes in under a minute.
- Sign in and connect. The app normally launches itself. Enter the email and password from your VPN subscription, skip or follow the quick tour, then hit the big Connect button – it auto-selects the best server for your location. You’re protected.
Step-by-Step: Manual OpenVPN Configuration on Windows
If you prefer open-source software and maximum trust, OpenVPN is a great manual route. The protocol is open-source and its official client is trusted by security professionals worldwide.
- Download OpenVPN Connect for Windows. Get the official “OpenVPN Connect” client from the OpenVPN website (version 3.x is standard in 2026). Prefer the command line? Open PowerShell as administrator and run
winget install OpenVPNTechnologies.OpenVPNConnect. - Import your provider’s configuration files. Your VPN provider supplies OpenVPN config files (usually ending in
.ovpn). Download them, open OpenVPN Connect, and drag-and-drop the.ovpnfile into the client – or click the + icon to import via the file browser. - Connect using your profile. Click the imported profile, enter your VPN username and password when prompted (and your MFA code if the provider uses it). The system-tray icon turns green to confirm you’re connected.
Advanced: Installing a Windows VPN Using the Command Line (CLI)
For IT admins or power users deploying VPNs across many machines, command-line installs are a huge time-saver. In 2026, winget and Chocolatey are the standard tools.
Using Winget (Windows Package Manager)
Open Command Prompt or PowerShell as administrator. Search for the client, then install by its exact package ID:
winget install <Publisher.VPNClient>
Silent installation for enterprise VPNs
Many enterprise clients (for example the Securepoint VPN Client) support silent-install parameters, letting you deploy without any user interaction – ideal for group policies. A typical command looks like:
Troubleshooting Common Windows VPN Installation Issues
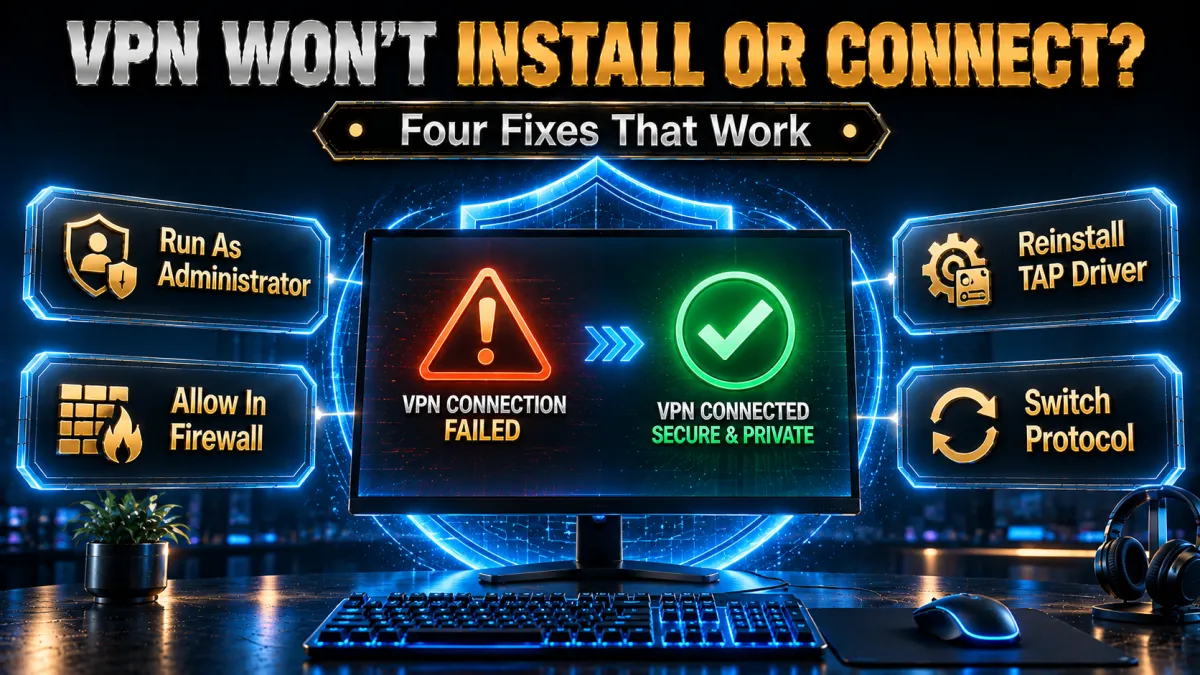
Sometimes it doesn’t go smoothly. Here are the most common install problems and their fixes.
The VPN installer fails to run
Check permissions: make sure you’re running the installer as administrator – without it, the VPN can’t install its network drivers. Corrupted download: the file may have been damaged mid-download; delete it and re-download from the official source.
Compatibility errors during setup
Architecture mismatch: confirm you downloaded the right build (64-bit vs 32-bit vs ARM64). Most 2026 systems are 64-bit, but ARM devices like the Surface Pro X need the ARM64 version. .NET runtime: some older clients need a specific .NET Desktop Runtime – check the VPN’s docs and grab the required runtime from Microsoft.
Antivirus interference
Third-party antivirus tools sometimes flag VPN installers as threats or block them from making system changes. As a temporary fix, disable your antivirus during installation only – and re-enable it immediately afterwards.
Setting Up Multi-Factor Authentication (MFA) with Your Windows VPN
Security in 2026 is largely about Zero Trust, and MFA is a big part of it. Most universities and companies now require MFA to connect to their VPNs. If you’re setting up a work or school VPN:
- Enrol in MFA first. Before installing the VPN, make sure your account is enrolled in an MFA system – Microsoft Authenticator, Duo, or a TOTP app.
- Log in as usual. When you connect, enter your password.
- Provide the second factor. You’ll then be prompted for a push notification, an authenticator code, or a physical YubiKey tap. Even if your password is ever compromised, your VPN connection stays protected.
After You Install: 4 Things to Check
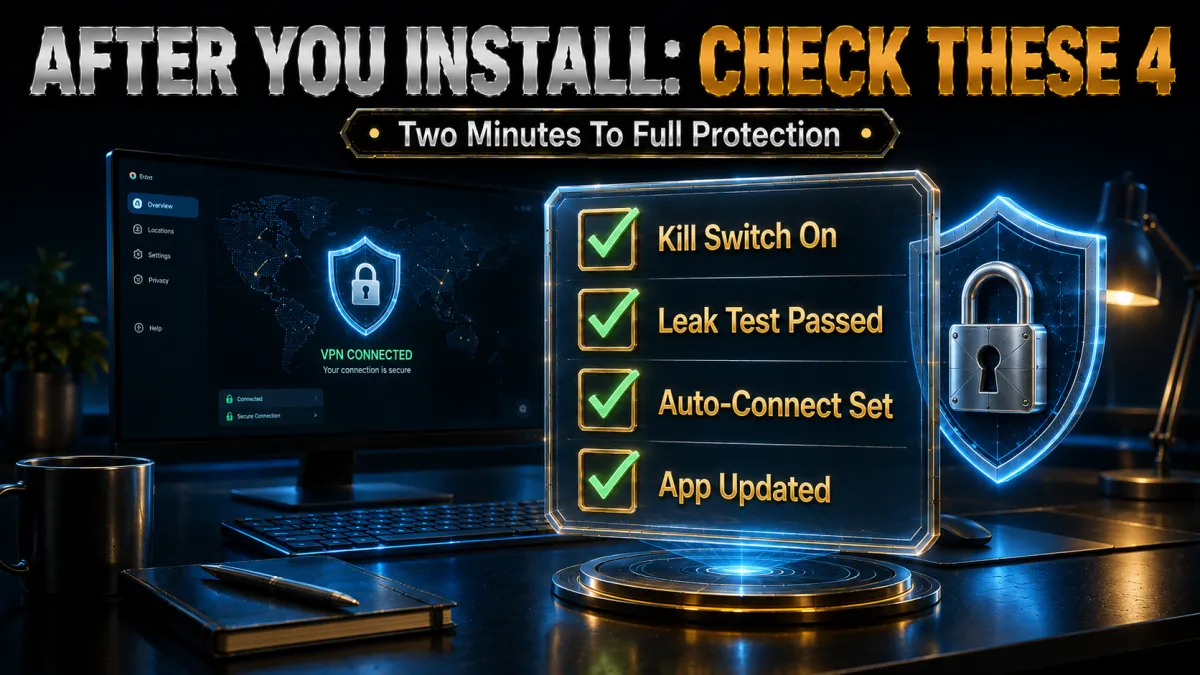
Installing the app is step one. These quick checks confirm it’s actually protecting you:
- Turn on the kill switch in settings so a dropped connection can’t leak your IP.
- Run a leak test – visit a DNS/IP leak test site while connected and confirm it shows the VPN’s IP and location, not yours.
- Set it to launch on startup and auto-connect, so you’re never accidentally unprotected.
- Pick WireGuard in the protocol settings for the best speed, unless a network blocks it (then fall back to OpenVPN).
How to Set Up the Built-in Windows VPN Client (Step-by-Step)
Even if you use a third-party app for privacy, it’s worth knowing the native client – it’s how you connect to a work network or a server you host yourself. Here’s the manual setup on Windows 11 (Windows 10 is nearly identical):
- Open the VPN settings. Go to Settings → Network & internet → VPN, then click Add VPN.
- VPN provider. Choose Windows (built-in) from the dropdown.
- Connection name. Type anything memorable, e.g. “Work VPN” or “Home Server”.
- Server name or address. Enter the hostname or IP your admin/provider gave you (e.g.
vpn.company.com). - VPN type. Pick the protocol – IKEv2 is the best default; use L2TP/IPsec, SSTP or “Automatic” only if instructed.
- Sign-in info. Choose username/password, smart card, one-time password, or certificate, then enter your credentials and click Save.
- Connect. Back on the VPN screen, click your new connection and press Connect. The status shows “Connected” when it’s up.
Common Windows VPN Error Codes and How to Fix Them
Even a clean install can throw a numbered error the first time you connect. Here are the ones Windows users hit most and the fix for each:
| Error | What it means | How to fix it |
|---|---|---|
| 691 | Wrong username or password | Re-enter credentials; check Caps Lock and the domainusername format |
| 720 | No PPP control protocols | Reset or reinstall the WAN Miniport adapters in Device Manager |
| 789 | L2TP/IPsec negotiation failed | Enable IPsec, verify the pre-shared key, and allow UDP 500/4500 in the firewall |
| 800 | Can’t establish the connection | Server unreachable – check the server address, your internet, and firewall |
| 807 | Connection was terminated | Unstable network or protocol mismatch – reconnect or switch protocol |
| 809 | Firewall / NAT is blocking it | Allow the VPN ports; for L2TP behind NAT add the AssumeUDPEncapsulationContextOnSendRule registry key |
| 812 | Server policy mismatch | The server rejects your protocol – ask your admin which one to use |
General fixes that clear most of these: run the app as administrator, update your network adapter driver, temporarily disable third-party antivirus, and restart the IKE and AuthIP and RasMan (Remote Access Connection Manager) services from services.msc.
How to Set Up a VPN on a Windows Router (Whole-Home Protection)
Installing a VPN on your Windows PC protects that PC. Putting it on your router protects every device on the network at once – including consoles, smart TVs and IoT gadgets that can’t run VPN apps. You don’t do this inside Windows; you configure the router itself.
The overview: confirm your router supports OpenVPN or WireGuard (or flash DD-WRT / OpenWrt if it doesn’t), log into the router’s admin page, paste in your provider’s router configuration, and connect. Your Windows PC then rides the router’s tunnel automatically – no app needed. The trade-offs are that you can’t switch servers as quickly, and a cheap ISP router may bottleneck WireGuard at full speed, so check the router’s CPU before blaming the VPN.
Split Tunneling, Auto-Connect and Launch on Startup
Three settings turn a basic install into a set-and-forget one. Split tunneling routes only chosen apps through the VPN while everything else uses your normal connection – useful for keeping local devices reachable or skipping VPN overhead on trusted apps. In most Windows clients you’ll find it under Settings → Split Tunneling, where you add the apps to tunnel (or to exclude).
Launch on startup and auto-connect are the other two. Set the app to start with Windows and auto-connect to your last or fastest server, so you’re never accidentally unprotected after a reboot. Pair auto-connect with the kill switch and your PC is protected from the moment it boots – if the tunnel isn’t up, nothing leaves the machine unencrypted.
Free vs Paid VPN for Windows: What’s the Real Difference?

Free VPNs are tempting, but on Windows the trade-offs are real. Free tiers usually cap your data, throttle speeds, offer only a handful of servers, and skip the kill switch. More seriously, some free providers monetise by logging and selling browsing data – the exact opposite of what a VPN is for. On a Windows PC that holds your logins, banking and work files, that’s a poor trade.
A paid VPN gives you unlimited data, WireGuard speeds, an audited no-logs policy, and a proper kill switch – typically for a few dollars a month on a longer plan. The one honest exception is a reputable freemium tier (such as Proton’s) for light, occasional use. But for daily Windows privacy, a paid plan with a 30-day money-back guarantee is the safer and faster choice – you can install it, test it on your own connection, and refund it if it doesn’t deliver.
Windows VPN Glossary (Plain English)
The jargon you’ll meet during setup, translated:
- Kill switch – cuts your internet if the VPN drops, so your real IP never leaks.
- Split tunneling – lets you choose which apps use the VPN and which don’t.
- WireGuard – the modern, fast VPN protocol and the default in 2026.
- TAP / WireGuard adapter – the virtual network adapter the VPN installs; it’s how the tunnel works and it’s safe to leave installed.
- DNS leak – when DNS requests slip outside the tunnel and reveal your location; always test after installing.
- Obfuscation – disguises VPN traffic as ordinary HTTPS, useful on networks that block VPNs.
- No-logs policy – the provider doesn’t record what you do online; it means the most when independently audited.
How to Manually Set Up WireGuard on Windows
WireGuard is the fastest protocol in 2026, and you can run it directly with the official WireGuard for Windows app – handy if your provider hands you raw WireGuard configs, or if you self-host a tunnel. It’s lightweight and open-source.
- Install the app. Download WireGuard for Windows from the official site, or run
winget install WireGuard.WireGuardin an elevated PowerShell. - Get a tunnel config. Obtain a
.conffile from your VPN provider, or generate one on your own WireGuard server. - Import the tunnel. Open the app, click Add Tunnel → Import tunnel(s) from file and select the
.conf. To paste keys manually instead, choose “Add empty tunnel”. - Activate. Toggle the tunnel on. The app shows the latest handshake time and data transferred – a recent handshake means you’re connected.
.conf contains a private key. Anyone who gets that file can connect as you, so treat it like a password.Set Up a VPN on Windows with PowerShell
For scripting, login scripts or configuring many identical machines, PowerShell can create a built-in VPN connection with no GUI at all. Open PowerShell as administrator and run a command like:
Then connect from the command line with rasdial "Work VPN" username password. You can review existing connections with Get-VpnConnection and remove one with Remove-VpnConnection -Name "Work VPN" -Force. This approach is ideal for IT admins rolling the same VPN out across a fleet of PCs, since the whole setup becomes a repeatable script rather than a click-by-click chore.
How to Make Your Windows VPN Connect Automatically
The safest VPN is the one you never forget to turn on. For a third-party app, enable Launch on startup and Auto-connect in its settings – the app then starts with Windows and connects to your last or fastest server before you open a browser.
The built-in Windows client doesn’t auto-connect on its own, so use Task Scheduler: create a task triggered “At log on” with the action rasdial "Work VPN" (and your stored credentials). Pair either method with a kill switch or a firewall rule that blocks traffic outside the tunnel, and your PC is protected from the moment it boots – no manual step, no accidental leaks.
How to Test That Your VPN Is Actually Working
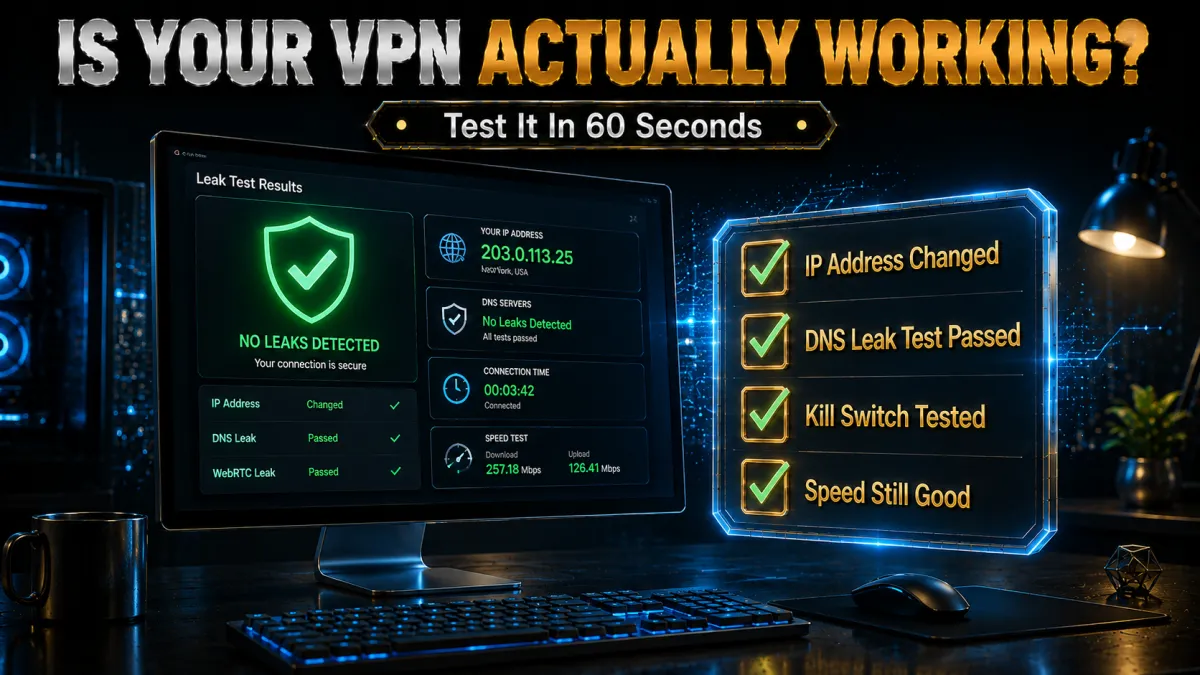
Installing is only half the job – these four checks confirm the VPN is really protecting you:
- IP check. While connected, search “what is my IP”. It should show the VPN server’s IP address and country – not yours. If it still shows your real location, the tunnel isn’t up.
- DNS leak test. Visit a DNS-leak test site. Every DNS server listed should belong to the VPN, not your ISP. Leaked ISP DNS means your browsing can still be logged.
- WebRTC leak test. Browsers can expose your real IP through WebRTC even on a VPN. Run a WebRTC leak test; if it reveals your real IP, disable WebRTC in the browser or use the VPN’s browser extension.
- Kill-switch test. With the kill switch on, disconnect the VPN server mid-download. Your internet should cut out entirely until it reconnects. If traffic keeps flowing, the kill switch isn’t actually protecting you.
Using Your Windows VPN on Tethering or a Mobile Hotspot
If you tether your Windows laptop to your phone, or use mobile data, the VPN still works exactly the same – the encrypted tunnel simply rides on top of whatever internet the PC has. The one thing to expect is lower speed and higher latency, since mobile data is more variable than fixed broadband, so choose a nearby server and WireGuard to keep the overhead small.
One caveat if you turn your PC into a hotspot for other devices: those devices are not automatically on the VPN unless you bridge the VPN adapter to the shared connection. For genuine whole-network coverage, a router install (covered above) is far cleaner than sharing a single PC’s tunnel.
Installing a VPN on Windows Server (2019 / 2022)
Windows Server is a slightly different case. You might install a VPN client on it to reach another network, or – more often – turn the server itself into a VPN so staff can connect in. To use it as a client, the third-party apps behave exactly as they do on desktop Windows.
To host a VPN with the built-in tools, use the Routing and Remote Access Service (RRAS): add the “Remote Access” role in Server Manager, open Routing and Remote Access, run the setup wizard, choose VPN access, pick a protocol (IKEv2 or SSTP are the modern choices), and configure a static address pool. Then open the required firewall ports and create the user accounts allowed to connect. This is how many small businesses give employees secure remote access without paying for a commercial subscription – the staff PCs simply connect using the built-in Windows client covered earlier in this guide.
VPN Browser Extension vs the Full Windows App
Most providers offer a browser extension alongside the desktop app, and it’s important to know they are not the same thing. The full Windows app encrypts all traffic from every app on your PC – your games, email client, cloud sync and Windows Update included. A browser extension usually only proxies traffic inside that one browser; everything outside it stays on your real IP, and some extensions even leak your real address through WebRTC.
Extensions do have their place: they’re lightweight and let you set a different location per browser, which is handy for a quick geo-check or keeping one browser in another region. But they are not a substitute for system-wide protection. The rule of thumb is simple – install the full app for genuine privacy on Windows, and treat the extension as a convenience layer on top, never as your only defence.
Keeping Your Windows VPN Secure: Updates & Maintenance
Installing the VPN isn’t a one-and-done job. Providers push updates that patch security holes and refresh their server IPs and obfuscation to stay ahead of blocks – an outdated client is measurably less secure and often slower. Turn on auto-update in the app, or check for updates monthly.
A few more habits keep everything healthy. Re-run a leak test after any major Windows feature update, since those occasionally reset network settings. Keep your protocol on WireGuard unless a network forces a fallback to OpenVPN. Review which apps you’ve added to split tunneling now and then, so nothing sensitive is accidentally left outside the tunnel. And if you ever see the app say “connected” while websites still show your real IP, reinstall the network adapter – a corrupted TAP or WireGuard adapter is the usual culprit, and a clean reinstall fixes it in minutes.
Common Myths About VPNs on Windows
A few persistent myths trip up new Windows VPN users. Clearing them up helps you use the tool for what it actually does:
- “A VPN makes me completely anonymous.” No. It hides your IP and encrypts your traffic in transit, but you’re still identifiable the moment you log into an account, and the sites you use can still profile you. Treat a VPN as one strong privacy layer, not an invisibility cloak.
- “Free VPNs are just as good.” No. Free tiers cap data, usually skip the kill switch, and some monetise by logging and selling your browsing. On a PC that holds your logins, banking and work files, that’s a poor trade.
- “A VPN will slow my PC to a crawl.” No. On WireGuard with a nearby server the overhead is small and rarely noticeable outside of very large downloads. Old protocols and distant servers cause the slowdowns people remember.
- “Incognito mode does the same thing.” No. Private or Incognito browsing only stops your browser saving history locally – your ISP and the websites still see your real IP address. A VPN actually hides it.
- “I don’t need a VPN at home.” Partly true – home Wi-Fi is safer than public Wi-Fi – but your ISP can still log and sell your browsing, evening throttling still happens, and geo-blocks still apply. A VPN addresses all three.
With those cleared up, the choice of method is straightforward: for almost everyone the provider’s app is the right call, OpenVPN or WireGuard suits users who want open-source control, PowerShell and silent installs are for admins deploying at scale, and the built-in client is for reaching a work or home server you already own. Whichever route you take, turn on the kill switch, run a leak test, and keep the app updated – that’s the difference between a VPN that’s merely installed and one that’s genuinely protecting you.
Related reading:
FAQ: Installing a VPN on Windows
How hard is it to set up a VPN on Windows 11?
Surprisingly simple – download the provider’s app, run the installer (as administrator), sign in, and click Connect. It usually takes under a minute.
Do I really have to pay for a Windows VPN?
For genuine security and privacy, yes. Free VPNs often lack the essential safety features (kill switch, audited no-logs, WireGuard) and some monetise by selling data. Most reputable paid apps have a 30-day money-back guarantee so you can test risk-free.
What if I don’t have the admin password on my work PC?
Then you can’t install a standard VPN app – administrator rights are required to install the network driver. On a managed work PC, your IT team controls VPN access; ask them instead.
Which setting makes my Windows VPN run faster?
Switch the protocol to WireGuard – it’s the speed leader in 2026. Also connect to a nearby server and enable split tunneling so only the apps that need it use the VPN.
Do VPNs make a Windows computer laggy?
Not anymore. A good, modern VPN is lightweight and barely noticeable in day-to-day use, especially on WireGuard. Heavy slowdowns usually point to a distant server or an outdated protocol.
Is the built-in Windows VPN good enough?
Only for connecting to a server you already control (work or home). It can’t hide your IP, unblock streaming, or give you a global server network – for that you need a third-party app.
Should I use OpenVPN or a provider’s app?
For most people, the provider’s app is easier and just as secure. Manual OpenVPN suits users who want open-source software and full control, or who need to import custom config files.
How do I know the VPN is actually working after install?
While connected, run an IP/DNS leak test. If it shows the VPN server’s IP and country instead of your real ones – and reports no DNS leaks – you’re protected.
Can I install a VPN on Windows on ARM (Surface Pro X)?
Yes. Most major providers now offer ARM64 builds. Just make sure you download the ARM64 version rather than the standard x64 installer.
Does Windows Defender or the firewall block VPNs?
Usually not, but some third-party antivirus tools do. If a connection fails, allow the VPN app through the firewall: Settings → Privacy & security → Windows Security → Firewall & network protection → Allow an app through firewall.
Can I run two VPNs at once on Windows?
Not reliably as two apps – they fight over the network adapter and usually both drop. If you genuinely need chaining, run one VPN on your router and a second app on the PC.
Why does my VPN disconnect after the PC sleeps?
Windows tears down the network adapter on sleep. Enable “auto-reconnect” in the app so it reconnects on wake, and keep the kill switch on so nothing leaks in the gap.
Is it safe to leave the VPN’s network adapter installed?
Yes. The TAP or WireGuard adapter is a normal virtual adapter and is how the tunnel operates. Only remove it if you fully uninstall the VPN.
How do I completely uninstall a VPN from Windows?
Uninstall it via Settings → Apps, then remove any leftover TAP/WireGuard adapter in Device Manager and delete the connection under Settings → Network & internet → VPN.
Does a VPN slow down Windows Update or big downloads?
A little, from encryption overhead – usually minor on WireGuard. If you want full speed for updates, use split tunneling to exclude Windows Update from the VPN.
Can the free built-in Windows VPN change my country?
No. The native client only connects to servers you’re already authorised for (work or home). Changing your apparent country for streaming or privacy needs a commercial VPN app with its own global server network.
Which is safer on Windows, OpenVPN or WireGuard?
Both are very secure. WireGuard is newer, faster and has a much smaller codebase (easier to audit); OpenVPN is battle-tested and slips through restrictive networks more easily. Either is a solid, safe choice.
Do I need admin rights every time I connect?
No – administrator rights are only needed to install the app and its network driver. After that, connecting and disconnecting is a normal-user action.
Why is my download slower with the VPN on?
Encryption adds a little overhead, and a distant server adds latency. Pick the nearest server and switch to WireGuard for the smallest speed hit – on a good connection the difference is usually minor.
Can a VPN get me banned from a game or streaming service?
Using a VPN is legal, but some services restrict known VPN IP ranges and may block or limit them. For gaming specifically, see our game-by-game guides – most punishments are temporary, not permanent.
The Bottom Line
Installing a VPN on Windows in 2026 is easier than ever, and you have three solid routes. For almost everyone, the provider’s app is the answer: download it from the official site, run it as administrator, sign in, and connect in about a minute. Choose OpenVPN if you prefer open-source software and manual control, or the command line if you’re deploying across many machines. Whichever you pick, turn on the kill switch, run a quick leak test, and set WireGuard as your protocol for the best speed.
The five picks in one line each:
- NordVPN has the most polished Windows app of this group: sign in, connect, and NordLynx quietly handles the speed.
- ExpressVPN is the simplest install here, one screen, one button, and sensible defaults out of the box.
- Surfshark covers every Windows machine in the house on one plan with no device cap.
- CyberGhost labels its servers by task, so beginners pick the right one without reading a guide.
- IPVanish offers unlimited connections at a fair price, handy when several PCs need the same protection.
The most important thing is simply to use one. A few minutes of setup buys you encrypted traffic, a hidden IP, and a genuinely more private connection. New to VPNs? See our best VPN for daily use guide, or if speed is your priority, our why is my VPN slow fixes.
We may earn a commission if you buy through links on this page – it never affects which VPNs we recommend. Prices and features were correct at the time of writing and can change.
Jyoti VPN Expert leads VPN testing at VPN Expert Guide, covering streaming and regional access, speed and latency testing, and leak checks on Windows, Android and router-level setups. Our guides are built from vendor documentation, provider terms and our own connection testing on a residential line in India, and we publish those measurements in full so readers can check them. Every guide is reviewed before publication and dated so you can see how current it is.
Meet our testing team →Last updated: September 2, 2026